Catmandu Software Development
Dancer & Catmandu
Writing web applications should be easy and fun
Catmandu integrates very well with Perl frameworks such as Dancer for easy and fun webapp development. In the text below we will use our Catmandu tools to create small demo application: a web search engine that can be fed with CSV files.
This second part of the tutorial assumes some familiarity with Catmandu. If you have not yet read part 1, now would be a good time to do so: Getting Started.
Dancer provides an intuitive and minimalistic approach to create web applications. If you have already installed Task::Catmandu, then you are good to go. Otherwise, Dancer can be easily installed if you have cpanminus on your server:
cpanm Dancer
Creating a web application is as easy as running the command line dancer command.
dancer -a DemoApp
Change your working directory to DemoApp and boot up the build-in web server.
cd DemoApp
perl bin/app.pl
In the following section we are going to create a web form to upload a CSV file to the webserver. Open your editor and load the file 'lib/DemoApp.pm' which contains all the controller code of your application.
package DemoApp;
use Dancer ':syntax';

our $VERSION = '0.1';

get '/' => sub {
    template 'index';
};

true;
We add a new route '/upload' to the application which will display the content of the views/upload.tt template using the following code snippet.
get '/upload' => sub {
    template 'upload';
};<form action="/upload" method="post" enctype="multipart/form-data">
<p>
<input type="file" name="file">
</p>
<button type="submit" class="btn btn-large">
Upload
</button>
</form>
Restart your webapplication (perl bin/app.pl) and view your web form at http://localhost:3000/upload.
When you click on the submit button a file of your choice will be uploaded via a HTTP POST to the webserver. The contents of this file can be easily displayed by adding the following code to the DemoApp.pm controller:
  post '/upload' => sub {
     my $file = request->upload('file');

     $file->content;
  };
Restart your webapplication (perl bin/app.pl) and try it out. Your complete code should look now like this:
package DemoApp;
use Dancer ':syntax';

our $VERSION = '0.1';

get '/' => sub {
    template 'index';
};

get '/upload' => sub {
    template 'upload';
};

post '/upload' => sub {
    my $file = request->upload('file');

    $file->content;
};

true;
Now that we are able to upload a file to the webserver we can add Catmandu code to parse this data and send it to a Solr search engine. We first create a file catmandu.yml in the home directory of the DemoApp which contains the location of our Solr engine and the parameters for the Catmandu importer we are going to use to parse the data (CSV-files in our case):
store:
    default:
        package: "Solr"
        options:
            url: "http://localhost:8983/solr"

importer:
    default:
        package: CSV
        options:
            sep_char: ";"
Reading from a CSV importer and indexing into a Solr Store can be easily added to the DemoApp.pm controller by adding the following lines at the top of the DemoApp.pm module:
use Catmandu -load;
use Catmandu::Sane;

sub store {
    state $bag = Catmandu->store('default')->bag;
}

sub importer {
    my $file = $_[0];

    Catmandu->importer('default', file => $file);
}
It is now very easy to parse CSV data. We change our POST /upload route into:
post '/upload' => sub {
    my $file = request->upload('file');

    to_dumper( importer($file->tempname)->to_array );
};
Indexing all the fields in the CSV file into a Solr index is straight forward (read your Solr manual how to setup a Solr search engine with your own indexable fields [hint: schema.xml file]). All we need is to send the importer to a Solr Catmandu Store with the add_many command and commit the results.
post '/upload' => sub {
    my $file = request->upload('file');

    store->delete_all;

    store->add_many( importer($file->tempname) );

    store->commit;

    redirect '/';
};
Add this stage you'll have a basic website where you can upload a CSV-file into a Solr search engine. Next we are going to add a /search route to query the Solr index.
We start by creating a GET route /search in DemoApp.pm and provide it with a template to display a search box:
get '/search' => sub {
    template 'search';
};<form method="GET" action="/results">
<input type="text" name="q">
<button type="submit" class="btn btn-large">
Search
</button>
</form>
Next we are going to provide a GET route /results which will query the Solr index and display all the results:
get '/results' => sub {
     my $q     = param "q";
     my $start = param "start" // 0;
     my $limit = 10;

     my $results = [];

     if ($q) {
        $results = store->search(query => $q, start => $start, limit => $limit)->to_array;
     }

     template 'results' , { results => $results };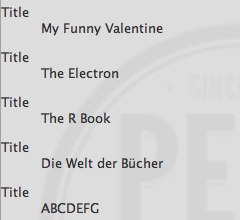
};<%FOREACH hit IN results%>
<dl>
<dt>Title</dt>
<dd><% hit.title %></dd>
</dl>
<%END%> template: "template_toolkit"
Restart the webserver and browse to http://0.0.0.0:3000/search to view the search box. When you execute the query *:* you should see a list of all your documents:
This concludes our very short introduction into Catmandu and Dancer. We hope we have provided you with enough material and inspiration for new and exciting projects ;). Please find in the included DemoApp.zip ZIP file an elaborate example of the code used in this tutorial.